
Vikkie's Portfolio
ARCHITECTURE
Computer Applications
Project 1: Modelling of an Architectural Design
This involves completion of basic form and external model of a selected architectural design. During this stage the completed 3D model will reflect the knowledge of using the software to create 3D geometries. 3D models will be assessed on the overall detail,complexity and creativity ised in the creation and development process.
Objectives & Learning Outcomes
-
Understand and execute the functions of Standard Primitives, Splines& MOdifiers.
-
Understand and utilise polygon modelingand NURBS modelling in producing the 3d models
-
To produce 3D model on a selected architectural design using 3DS Max/ Rhinoceros or both.
First of all, the building i choose is not the building from my final project during semester two. Instead it is a building called Neue Nationalgalerie by Mies van der rohe.
Before i begin building a 3D model, i have to look for several plans to makesure the plan is clear and readable. Then, insert the image in Auotcad and start tracing out the plan inorder to export to Rhino.


Then, import the plan to Rhino and start building the window frame using Extrude command.

Window frames are being installed.


Floor slab is added by using extruding command as well.

Roof is imported from autocad and being extruded.


Columns are also imported from autocad to Rhino.

Using Chamfer edge command.

A solid panel to represent the material of glass is being apllied to the frames.

Details of roof.

Combining the different components of this building into one.

After attaching the roof to the glass walls and columns, the 3D model is done.


Export rhino file as IGES file and import it to 3Ds Max to render.

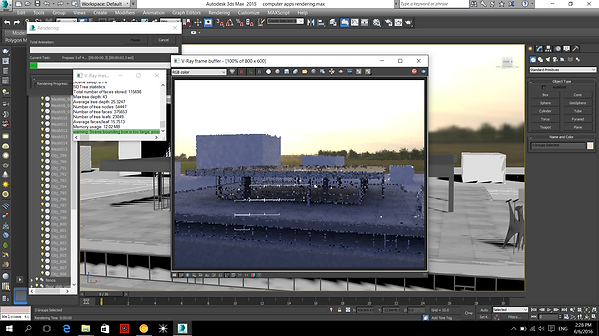
Before rendering, choose one of the angle we want to capture.

Select 800x600 pixel and start rendering.


Render five different views.


Project 2: Still Rendering with Materials, Lights, Camera Views with Site Context
The second project involves the production of photorealistic still rendering of the selected architecture design with materials, appropriate camera views and post production enhancement on the visual outcome. The visualisation work would be assessed on the types and ways materials are used to set up the scene, setup of appropriate camera views for rendering and skills of using post production tools to enhance the visual outcome.
Objectives of Project & Learning Outcomes
-
Able to import .dwg file into 3DS Max
-
To manage the 3D scene using layers
-
To create materials for 3D objects
-
Produce photorealistic still rendering of the selected building with materials, lighting, camera views and site context.
Firstly, to continue my last project's modeling, I am required to build the underground of Neue Nationalgalerie.
First, import autocad file and using extrude command to extrude the fence.

Then, extruding the windows and frames as well.

Completing site context by downloading the google maps of the building location.

Extruding boxy or solid geometry to represent the surrounding buildings.

The site context is completed.

Exporting layers by layers to 3DS Max. Save the files as 3ds/Obj.

Import the file one by one without touching anything yet.

After importing one file/later. Group them together as one category


Applying materials by looking for material tool. Look for diffuse button, and select 'bitmap'.
Then select the photos/ texture and import them to 3ds max.


Select part of the component to apply material.

Click on the 'material editor'

Click on the 'get material' button and drop down button to import material.

After importing the materials. Click on the 'assign to selction' key.

Apply lights with environment by selecting 'Environment'. Clicking on VRAY HDRI and choosing the environment effect we want.


Apply to the site context building with materials, Click on the 'diffuse' button. Import the photos and assign to selection polygon.
Applying the materials face by face, first right click and select ' convert to edit poly'. At edit poly, select 'polygon'.
Then, it is able to assign material face by face. But this method has to be repeated at every faces.


Set camera, and adjust the camera view.
First Select the camera button

Select the 'RayPhysicCamera'.

Change the focus length and film gate.

when applying materials are done and angle with camera is loacted and selected. Click on the 'Render Setup' to change the setting or resolution.

Select on the 'Render Production' and wait for the rendering to be done. and save as JPEG.

Site Context. The building is located in cirt and surrounded by buildings.
Exterior Rendering (EDITED WITH PHTOSHOP)


Project 2b: Interior Renderings
Continue with the previous project which is about exterior and interior renderings. Appy materials to the interior furnitures such as wall, handrails and etc.


After completing inputing material on first floor, move on to the ground floor by importing 3DS model fil from rhino to 3ds Max.

Select the import and impot the 3DS Files.

After that, download the 3D model from http://www.3d66.com/DownResHtml/rar/9606_33515.html. Import the 3DS file as well.

Importing the 3Ds file from computer.

Afterwards, apply the materials as well.

Inserting the wall lamps which downloaded from http://www.3d66.com/DownResHtml/rar/9606_33515.html.

Insert sculpture as well.


Making cylinder tube as light bulb to illuminate.


Applying material and select self illuminate.


Adding Vraysun to the environment and changed the environment to vraysky.

Importing IES light to 3ds Max.


Ungrouping the 3D max file and apply material individually.


Inserting Vraysun and also Vraylight to get natural sunlight from the external. Select Vraysun and do some settings.


Applying materials to the first floor interior.


Test Renderings


Interior Renderings


Project 3: A Maximum 90 secongs Animation of the Completed 3D scene
This project involves production of a maximum 90 secongs animation of the completed 3D scene using 3DS Max's animation commands and tools. It also inlvoves simple video editing work such as stitching video clips, background music & special editing, through the use of Window Movie Maker,Imovie Adobe Premiere and After Affects.
First of all, drawing a pathway with the angle i want using Spline or NUSBS line.

Objectives & Learning Outcomes
-
To continue from Project 2, the completed scene is animated.
-
To set up camera paths for animation rendering.
-
Produce photorealistic animation renders
-
To record Work in Progress( WIP) as progressive evidence of the working process.
Drawing pathway.
Setting camera by selecting animation and choose walkthrough assistant.

You can edit the line by choosing vertex segment and etc.

Selecting any camera or create a new walkthrough camera. After that, picking a path way we wish to render.

Before test rednering. make sure the setting is for animation by going under Render Setup.
(a) Set range 0 - 100, or according to the part you wish to render
(b) Choosing Pal as my output size
(c) Select the most suitable resolution to render, as i choose 800x600 ( Limited time is given for this project)
(d) Makesure to save the files in sufficient storage

Make sure the 'save files' option is saved under sufficient storage area. And change the file name everytime after rendering. so it wont overlap with the previous one.

Save as AVI file format.

Test Rendering.


After test rendering, picking the right path and do all the correct setting and begins the rendering
.


Transfering the AVI Files to imovie and strt making animation video.

Adding background music, slowing down the clips or incresing the speed of the animation.

Animation
My concept of this animation is '' The Artbox Expedition'' instead of making story i will just attemptto make an exploring animation video about this wonderful gallery of Berlin.
Neue Nationalgalerie were Mies Van der Rohe quoted ''Less is more''
Choose 720 HD for higher resolution